What is a Campaign?
An optinopoli™ campaign dynamically displays a creative on your site that encourages visitors to take a desired action. This creative might be a Lightbox, Smartbar, Welcome Mat or an inline Widget. The goal of a campaign might be to capture leads, drive traffic to a URL or make an announcement.
With our unique Smart Campaign technology, you can use campaigns to personally engage new leads, build your relationship, convert them into buyers and grow your sales revenue.
Here's how to quickly launch an initial campaign . . . and start capturing new leads.
How to Launch Your First optinopoli™ Campaign

01
Click to add a new campaign
Click Campaigns from the sidebar and then the Add New Campaign button. Or just click here to go straight to the relevant page in your account.
02
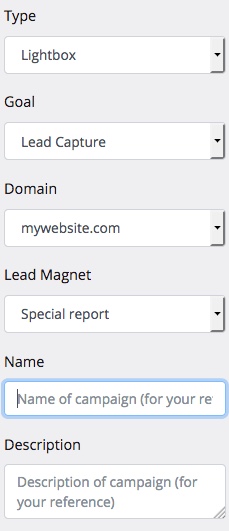
Set general settings
From the General tab, choose the Type you want to show—Lightbox, Smartbar, Welcome Mat or inline Widget.
You may want to use a different Goal in future, but leave it as Lead Capture for now.
The campaign preview shows on the right (on desktop), displaying the copy (and possibly image, depending on Type) for the selected Lead Magnet. The copy and image can be adjusted as required (see Step 05 below).
Enter a name for the campaign and optional description for your reference.

03
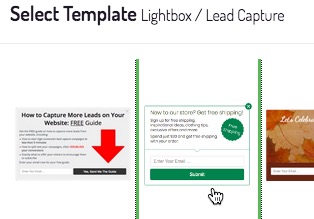
Choose a template
The easiest way to launch your first campaign is to use one of our professionally-designed templates.
You'll find different templates depending on the chosen Type and Goal.
Click the Show Templates button from the General tab.
Choose to keep the existing copy from your Lead Magnet, or overwrite with copy from the template. Where applicable to the chosen Type, the same applies to the image.
04
Adjust the style
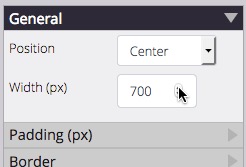
From the Styling tab, adjust the style to suit your requirements.
Styling options differ according to the chosen Type, but might include for example positioning, width, background color and image, border options, image positioning. Experiment with the different settings to get the exact look you want.
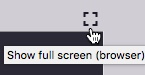
The preview automatically adjusts to reflect your chosen settings. Click the full screen icon towards top right for a full screen preview in your browser.
Note: Campaigns are suitable for all devices—the creative is fully responsive. That means the width and other layout aspects may be automatically adjusted as required for smaller devices.
05
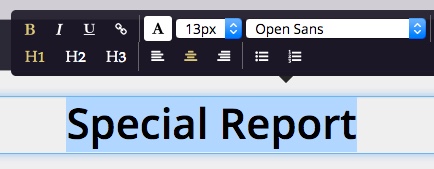
Edit the content
To edit the content of the campaign, click on the text.
Highlight text for rich text editing options, including font style, color, size and so on.
Click on the image (where showing) to change as required. Uploaded images are stored per domain in your account for easy future access.
06
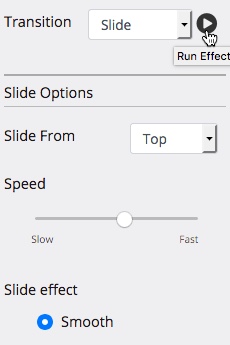
Add visual effects
From the Effects tab, choose from a range of eye-catching visual transitions to attract the attention of your visitor.
Each transition comes with different options (such as speed, strength and direction) to customize it as desired.
You'll see an auto-preview of the transition each time you make a change—or click the play icon to preview at any time.
07
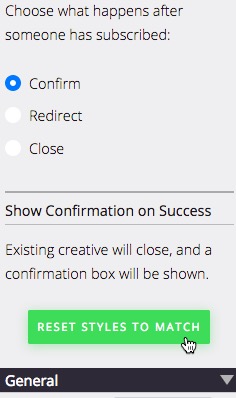
Set success options
Choose what you want to happen after you capture a new lead (Lead Capture campaigns only).
From the Success tab, choose to show a confirmation box, to redirect the visitor to another URL (optionally with lead data), or to simply close the creative (and optionally reload the page).
With the Confirm option, click Reset Styles to Match to make it match the style of the main creative. Customize as required.
A download button for your Lead Magnet can be toggled on or off.
You can also add any conversion scripts to this tab (e.g. from Google Analytics) that you want to run when someone signs up.
08
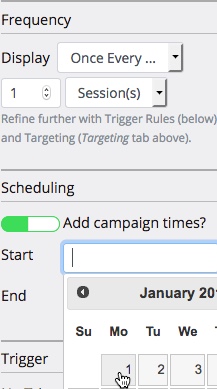
Set display rules
The Display Rules tab provides a number of powerful settings that control when the campaign runs for a visitor.
Choose how frequently it should show for each visitor (e.g. once per day).
If you wish, schedule the campaign with a specific start (and optional end) date.
Add one or more triggers to determine when the campaign creative should show. Triggers include clicking a link, site visit duration, intention to leave, and more, and can be combined as required. Triggers are not available for Widgets.
09
Add targeting
Use precise targeting options to target who will see the campaign.
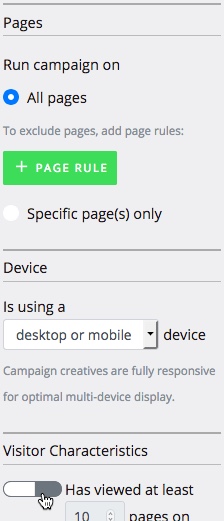
From the Targeting tab, choose to run the campaign on all pages (with optional exclusions), or on specific pages only.
Target both desktop and mobile visitors, or either individually. Remember campaigns are responsive and automatically adjust for different devices.
Target specific visitor characteristics, such as the number of pages viewed on your site, new or returning visitors, their geo-location, referral URL, Adblock usage, and specific cookies.
10
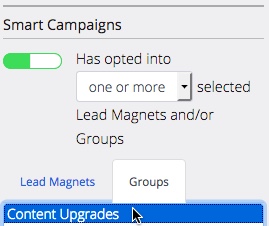
Use Smart Campaigns
With Smart Campaigns, you can run follow-on campaign(s) as soon as a new lead has entered their details, move them through your sales funnel, and convert them into a buyer.
To use, toggle the switch to on, and then select the Lead Magnet(s) or Lead Magnet Group(s) in question.
You can also use Smart Campaigns to stop showing one or more campaigns to the visitor as soon as they have signed up for a particular Lead Magnet.
The latter option is useful where you have multiple campaigns for different Lead Magnet offers that you want to stop all at the same time, once a visitor has responded to one of them.

11
Save the campaign
Finally, click Add Campaign to save the campaign.
You can also save partial information at any point via Save Draft. Note you cannot make draft campaigns live (see next step).
12
Make live
Once saved, the campaign won't start running until you make it live.
To do so, toggle the Live/Not live switch provided. Campaigns can be turned on/off as required at any time.
When turned on, the campaign will run in line with your page rules, targeting options, and so on.


Power Step
Advanced—Maximize Conversions
Of course, you have no way of knowing what your visitors best respond to unless you test.
Different creatives—and different Lead Magnets—can far outperform others. Without testing, it's pure guesswork.
Continuous testing is of course essential—and easy to take care of with optinopoli™.
To start split testing, edit your campaign and click the + Add Variation button provided. Decide what you want to test, and edit the variation(s) accordingly.
Split the traffic as required, and compare the results via our in-built analytics.
When you have a winning variation, you can make that the new control. Then set up a new test to try to increase results further.
Click here for more information about split testing in optinopoli™.
Need Further Help?
Contact us at support@optinopoli.com