Get Started
Make sure you're logged into your optinopoli™ account—click here to log in.
After logging in, you'll see the simple 1-2-3 steps you need to launch your first campaign—or just click here to view. You'll find more info on each step below.
1. Add a Domain
Add the domain (your website) where you want to use optinopoli™. Install the code provided. Then control everything through the optinopoli™ dashboard.
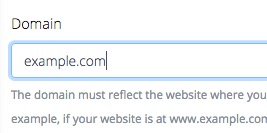
This step asks you to enter your website's domain name. For example, example.com.
Click here to add your website's domain name.
Make sure you enter it accurately—or optinopoli™ won't work on your website:
- You don't need the www bit.
- You must have the '.com' bit (TLD), or whatever that might be for your domain (e.g. .org).
So, for example, you would enter example.com rather than www.example.com or example.
After entering your domain, you'll see the code you (or your webmaster) need to add.
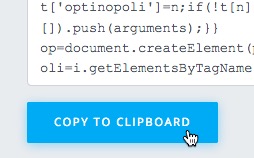
Add the code just before the closing <body> tag of your website so that it shows on each page.
If you're on Wordpress, just use our free plugin.
Once installed, move to Step 2 of 3 below to add a Lead Magnet.
2. Add a Lead Magnet
What are you offering to encourage prospects to leave you their details? It might be something to download, a page with a free resource, or perhaps an opportunity to request a free quote. The choice is yours.
A Lead Magnet is an incentive to encourage interested prospects to leave you their details so you can then follow up with them.
By adding a suitable Lead Magnet to your account, you can then offer it to visitors via one or more campaigns, using Lightboxes, Smartbars, Welcome Mats, inline Widgets and Landing Mats.
Click here to add a Lead Magnet.
Some ideas include:
- Free video(s)
- A download of a special report
- A free quote or consultation
The possibilities are endless. Consider who your ideal customer is, what they're interested in, and what might attract them.
If you don't have a specific Lead Magnet right now, just use a simple ‘Get Regular Updates’ type offer to get started.
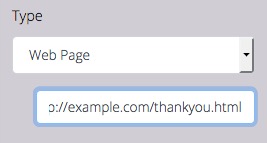
For this type of offer, simply select Web Page from the Type dropdown (as shown above), and provide the link to a thank you page that new leads will be shown after entering their information.
Or you may want to offer a downloadable resource. In this case, you can simply upload the file to your optinopoli™ account:
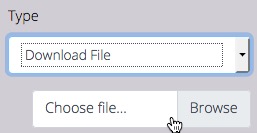
Doing so means you can easily enable new leads to download the Lead Magnet, without requiring developer support or needing to manage multiple Lead Magnets in different locations.
Next, do the following:
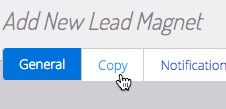
- Add some default copy (including an image) via the Copy tab. This makes it really quick to launch different campaigns for the same Lead Magnet.
- On the Notifications tab, choose whether to send an email notification each time a new lead is captured (recommended). This is on by default.
-
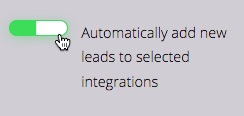
Click the Integrations tab and toggle the switch to automatically add new leads to selected integrations, such as your CRM.
Click the CRM you want to integrate with and follow the instructions provided to connect:
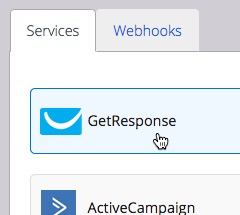
If you don't see yours listed, please contact us to ask if we support it.
You can also send lead data direct to a URL of your choosing via the Webhooks tab.
Once you've added a Lead Magnet, move to the final step below to launch a campaign.
3. Launch a Campaign
Finally, launch a campaign on your website to start capturing new leads.
A lead capture campaign offers your chosen Lead Magnet to visitors, using a creative type of your choosing, such as a Lightbox popup.
Click here to launch your first campaign.
To launch your first lead capture campaign, do the following:
-
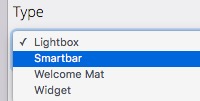
Choose whether to show a Lightbox, Smartbar, Welcome Mat, or inline Widget. (Landing Mats can be used to link to campaigns from third-party sites).
In the preview pane, you'll notice your chosen creative is prefilled with the default copy and, where appropriate, the image from your Lead Magnet. If you don't want to show an image, you can turn it off via the Styling tab (Body > Image).
- Leave the Goal set to Lead Capture.
-
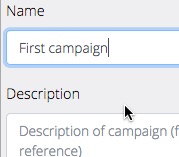
Enter a name, and optional description.
-
Click the Styling tab to customize the appearance of the creative.

You will see any changes you make reflected in the preview pane.
Similarly, click on the text within the creative to edit the copy as required.
-
Add visual transitions if required via the Effects tab. There are 10+ such transitions, with multiple options to customize them exactly as required.

-
From the Success tab, choose what happens after you capture a new lead. For example, choose to show them a confirmation box (with optional download button) or choose to redirect them elsewhere.
-
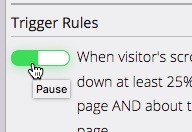
Click the Display Rules tab to set frequency options, and set Trigger Rules to determine when the campaign should show.

-
From the Targeting tab, determine which pages of your website the campaign will run on (see how to target campaigns to specific pages). You can also target specific devices and visitors with particular characteristics.

-
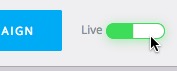
Click to add the campaign. The campaign won't launch until you make it live.

-
When you're ready, toggle the switch provided to make it live. The campaign will immediately start running.
For initial testing, it's recommended to set the frequency (on the Frequency tab) to Every Time .

If you don't see the campaign creative immediately on your website, check the Pages settings on the Targeting tab, along with your Trigger Rules (via the Display Rules tab).
For example, try pausing any Trigger Rules, and then trying again.
To remove any cookies that may stop you seeing the campaign—for example, after testing the opt in form—try using a brand new private/incognito browser window (ensure any other such windows are closed first).
Congratulations on launching your first campaign!.
Need Further Help?
Contact us at support@optinopoli.com